首先要说的是context/context.go源码是一个非常值得学习的实现案例,非常建议阅读源码。 其次关于context的功能简单点可以一言以蔽之:
「context 用来解决 goroutine 之间退出通知、元数据传递的功能。」
具体来说,context 提供了以下能力:
- 退出通知:通过
context的取消机制,可以通知多个 goroutine 优雅退出。 - 元数据传递:通过
context的WithValue方法,可以在 goroutine 之间安全地传递数据。 - 超时控制:通过
WithTimeout和WithDeadline,可以为操作设置超时时间。
四个常见方法
context 包提供了四个核心方法,用于创建和操作 context:
func WithCancel(parent Context) (ctx Context, cancel CancelFunc)func WithDeadline(parent Context, deadline time.Time) (Context, CancelFunc)func WithTimeout(parent Context, timeout time.Duration) (Context, CancelFunc)func WithValue(parent Context, key, val interface{}) Context
三个常见使用场景
传递共享的数据
通过 WithValue,可以在 goroutine 之间传递共享的数据。
func main() {
	ctx := context.Background()
	process(ctx)

	ctx = context.WithValue(ctx, "traceId", "qcrao-2019")
	process(ctx)
}

func process(ctx context.Context) {
	traceId, ok := ctx.Value("traceId").(string)
	if ok {
		fmt.Printf("process over. trace_id=%s\n", traceId)
	} else {
		fmt.Printf("process over. no trace_id\n")
	}
}
取消 goroutine
通过 WithCancel、WithDeadline 或 WithTimeout,可以创建一个可取消的 context,并将其传递给多个 goroutine。当需要取消这些 goroutine 时,只需调用 cancel 函数即可(或等待context超时)。
func main() {
    ctx, cancel := context.WithTimeout(context.Background(), time.Hour)
    go Perform(ctx)
    cancel()
}

func Perform(ctx context.Context) {
    for {
        select {
        case <-ctx.Done():
            // 被取消,直接返回
            return
        default:
            doSomething()
        }
    }
}
防止 goroutine 泄漏
context 的取消机制可以确保 goroutine 在不再需要时及时退出,本质还是取消 goroutine 从而避免 goroutine 泄漏。
func gen(ctx context.Context) <-chan int {
	ch := make(chan int)
	go func() {
		var n int
		for {
			select {
			case <-ctx.Done():
				return
			case ch <- n:
				n++
				time.Sleep(time.Second)
			}
		}
	}()
	return ch
}

func main() {
	ctx, cancel := context.WithCancel(context.Background())
	defer cancel() // 避免其他地方忘记 cancel,且重复调用不影响

	for n := range gen(ctx) {
		fmt.Println(n)
		if n == 5 {
			cancel()
			break
		}
	}
	// ……
}
Context.Value查找过程
通过 WithValue 函数,可以创建层级结构的 valueCtx 来存储 goroutine 间可以共享的变量,最终形成这样一棵树:
 和链表有点像,只是它的方向相反:
Context 指向它的父节点,链表则指向下一个节点。
取值的过程,实际上是一个递归查找的过程:
func WithValue(parent Context, key, val any) Context {
    if parent == nil {
        panic("cannot create context from nil parent")
    }
    if key == nil {
        panic("nil key")
    }
    if !reflectlite.TypeOf(key).Comparable() {
        panic("key is not comparable")
    }
        return &valueCtx{parent, key, val}
}

func (c *valueCtx) Value(key interface{}) interface{} {
    if c.key == key {
        return c.val
    }
    return c.Context.Value(key) // 此时的c.Context是parent,向上的递归查询
}
它会顺着链路一直往上找,比较当前节点的 key 是否是要找的 key,如果是,则直接返回 value。否则,一直顺着 context 往前,最终找到根节点(一般是 emptyCtx),直接返回一个 nil。所以用 Value 方法的时候要判断结果是否为 nil。
因为查找方向是往上走的,父节点没法获取子节点存储的值,子节点却可以获取父节点的值。
所以,整体上而言,用 WithValue 构造的其实是一个低效率的链表。
查找过程的坑
- 子 context 覆盖父 context:如果在子
context中设置了与父context相同的键,子context的值会覆盖父context的值。这种行为可能会导致意外的结果,因此在使用WithValue时需要特别注意键的唯一性。
源码解析
Context 接口
Context 是一个interface,定义了四个方法:
type Context interface {
    Deadline() (deadline time.Time, ok bool)
    Done() <-chan struct{}
    Err() error
    Value(key interface{}) interface{}
}
Deadline:返回context的截止时间。Done:返回一个只读channel,用于接收取消通知。Err:返回context被取消的原因。Value:返回与键关联的值。
包中以下结构体实现了此接口:
emptyCtx:最简单的,无实现逻辑,基础Context结构体backgroundCtx:由Background()函数返回的todoCtx:由TODO()函数返回的afterFuncCtx:go 1.21 版本后引入AfterFunc(ctx Context, f func()) (stop func() bool)用于定义Context被取消或超时后执行一个回调函数。(每个context的AfterFunc回调是独立的,父注册的函数不会作用到子)stopCtx同上在AfterFunc函数内间接使用cancelCtx能够主动取消,在取消时遍历所有可取消的子ContextwithoutCancelCtx使用WithoutCancel方法创建一个不被父Context取消所影响的子Context(Done方法返回nil队列)timerCtxWithDeadline和WithTimeout创建的ContextvalueCtxWithValue创建的Context
cancelCtx
所有可取消的Context都需要实现canceler接口,包含一个取消函数cancel()和返回只读队列的Done()函数
// A canceler is a context type that can be canceled directly. The
// implementations are *cancelCtx and *timerCtx.
type canceler interface {
	cancel(removeFromParent bool, err, cause error)
	Done() <-chan struct{}
}
Done方法不看了,直接看cancelCtx实现的cancel方法
// cancel closes c.done, cancels each of c's children, and, if
// removeFromParent is true, removes c from its parent's children.
// cancel sets c.cause to cause if this is the first time c is canceled.
func (c *cancelCtx) cancel(removeFromParent bool, err, cause error) {
	if err == nil {
		panic("context: internal error: missing cancel error")
	}
	if cause == nil {
		cause = err
	}
	c.mu.Lock()
	if c.err != nil {
		c.mu.Unlock()
		return // already canceled
	}
	c.err = err
	c.cause = cause
	d, _ := c.done.Load().(chan struct{}) // 懒惰创建
	if d == nil {
		c.done.Store(closedchan)
	} else {
		close(d)
	}
	for child := range c.children { // 遍历子节点cancel
		// NOTE: acquiring the child's lock while holding parent's lock.
		child.cancel(false, err, cause)
	}
	c.children = nil
	c.mu.Unlock()

	if removeFromParent {
		removeChild(c.Context, c) // 从父节点移除
	}
}
总体来看,cancel() 方法的功能就是关闭 channel;递归地取消它的所有子节点;从父节点从删除自己。达到的效果是通过关闭 channel,将取消信号传递给了它的所有子节点。goroutine 接收到取消信号的方式就是 select 语句中的读 c.done 被选中。
timerCtx
timerCtx 基于 cancelCtx,只是多了一个 time.Timer 和一个 deadline。Timer 会在 deadline 到来时,自动取消 context。
type timerCtx struct {
	cancelCtx
	timer *time.Timer // Under cancelCtx.mu.

	deadline time.Time
}
timerCtx 首先是一个cancelCtx,所以它能取消
func (c *timerCtx) cancel(removeFromParent bool, err error) {
	// 直接调用 cancelCtx 的取消方法
	c.cancelCtx.cancel(false, err)
	if removeFromParent {
		// 从父节点中删除子节点
		removeChild(c.cancelCtx.Context, c)
	}
	c.mu.Lock()
	if c.timer != nil {
		// 关掉定时器,这样,在deadline 到来时,不会再次取消
		c.timer.Stop()
		c.timer = nil
	}
	c.mu.Unlock()
}
创建 timerCtx 的方法:
func WithTimeout(parent Context, timeout time.Duration) (Context, CancelFunc) {
	return WithDeadline(parent, time.Now().Add(timeout))
}
WithTimeout 函数直接调用了 WithDeadline,传入的 deadline 是当前时间加上 timeout 的时间,也就是从现在开始再经过 timeout 时间就算超时。也就是说,WithDeadline 需要用的是绝对时间。
func WithDeadline(parent Context, deadline time.Time) (Context, CancelFunc) {
	if cur, ok := parent.Deadline(); ok && cur.Before(deadline) {
		// 如果父节点 context 的 deadline 早于指定时间。直接构建一个可取消的 context。
		// 原因是一旦父节点超时,自动调用 cancel 函数,子节点也会随之取消。
		// 所以不用单独处理子节点的计时器时间到了之后,自动调用 cancel 函数
		return WithCancel(parent)
	}

	// 构建 timerCtx
	c := &timerCtx{
		cancelCtx: newCancelCtx(parent),
		deadline:  deadline,
	}
	// 挂靠到父节点上
	propagateCancel(parent, c)

	// 计算当前距离 deadline 的时间
	d := time.Until(deadline)
	if d <= 0 {
		// 直接取消
		c.cancel(true, DeadlineExceeded) // deadline has already passed
		return c, func() { c.cancel(true, Canceled) }
	}
	c.mu.Lock()
	defer c.mu.Unlock()
	if c.err == nil {
		// d 时间后,timer 会自动调用 cancel 函数。自动取消
		c.timer = time.AfterFunc(d, func() {
			c.cancel(true, DeadlineExceeded)
		})
	}
	return c, func() { c.cancel(true, Canceled) }
}
在OpenTelemetry-Go中的应用
关于Context使用的一个实际案例体现在OpenTelemetry-Go包中。
OpenTelemetry (以下简称otel) 是一个开源的观测框架,用于生成、收集和管理Trace、Metric和Log数据。它旨在提供一套标准化的工具和 API,帮助开发者监控和诊断分布式系统的性能和行为。
OpenTelemetry-Go 则是使用Go语言实现otel规范的包,提供一套API生成分布式服务监控数据,并发送到支持otel协议的Collector中。
常见的使用otel来进行分布式链路追踪的实现方式如下:
分布式服务生成Trace信息 -> Export到otel-Collector -> Store在Tempo -> 最终在Grafana Dashboard进行观测
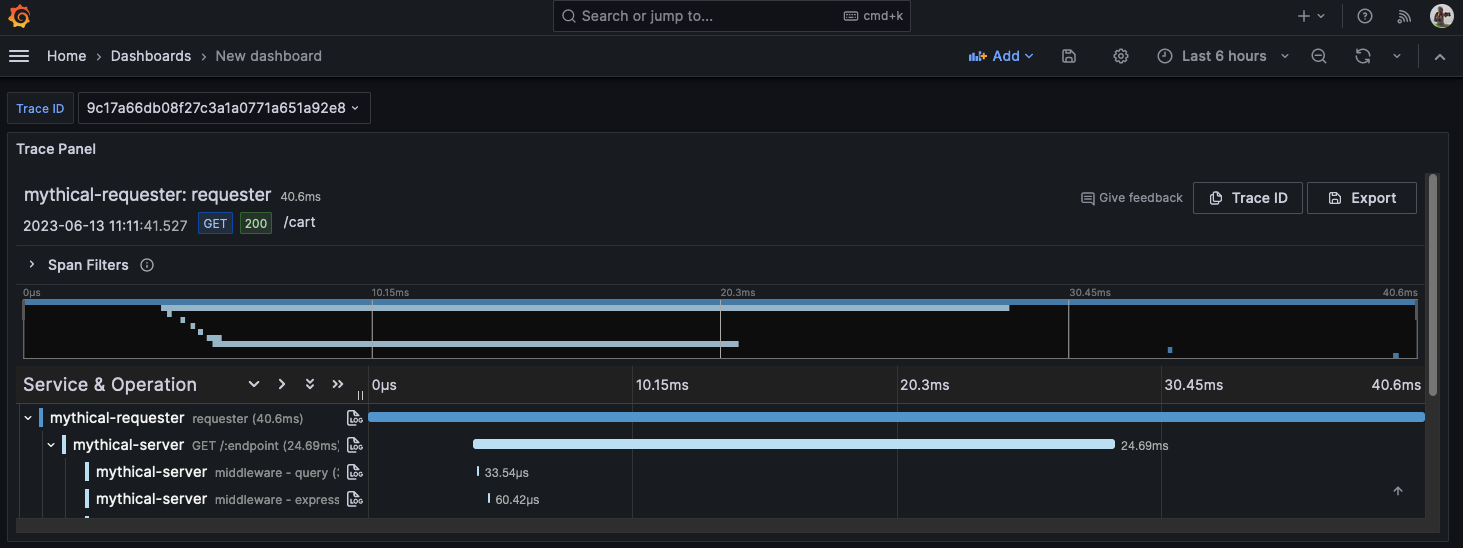
一条请求的Trace数据由一个TraceID和一系列Span数据组成,Span之间只有两种关系:ChildOf和FollowFrom。每个Span代表请求处理的不同阶段,如下图所示。
 所以在Trace的实现上,对于常见的Go服务(Http/Grpc)来讲,一次请求往往涉及到多个Goroutine并发处理数据,此时就需要一个能在Goroutine内传递、存取数据的容器。
那这个容器非Context莫属了,主要体现在以下几个方面:
存储、传递Span信息
OpenTelemetry使用Context来传递和存储Span信息,确保在分布式系统中的请求追踪能够正确关联:
// 创建一个新的Span
ctx, span := tracer.Start(ctx, "operation-name")
defer span.End()

// 在其他函数中使用同一个Context
doSomething(ctx)
这里的Context负责携带Span信息,使得在不同函数、不同Goroutine之间能够保持追踪上下文的连贯性。
我们来看一下Strat函数的实现细节
// Start creates a span and a context.Context containing the newly-created span.
//
// If the context.Context provided in `ctx` contains a Span then the newly-created
// Span will be a child of that span, otherwise it will be a root span. This behavior
// can be overridden by providing `WithNewRoot()` as a SpanOption, causing the
// newly-created Span to be a root span even if `ctx` contains a Span.
//
// When creating a Span it is recommended to provide all known span attributes using
// the `WithAttributes()` SpanOption as samplers will only have access to the
// attributes provided when a Span is created.
//
// Any Span that is created MUST also be ended. This is the responsibility of the user.
// Implementations of this API may leak memory or other resources if Spans are not ended.
Start(ctx context.Context, spanName string, opts ...SpanStartOption) (context.Context, Span)
// The Span is created with the provided name and as a child of any existing
// span context found in the passed context. The created Span will be
// configured appropriately by any SpanOption passed.
func (tr *tracer) Start(ctx context.Context, name string, options ...trace.SpanStartOption) (context.Context, trace.Span) {
	config := trace.NewSpanStartConfig(options...)

	if ctx == nil {
		// Prevent trace.ContextWithSpan from panicking.
		ctx = context.Background()
	}

	// For local spans created by this SDK, track child span count.
	if p := trace.SpanFromContext(ctx); p != nil {
		if sdkSpan, ok := p.(*recordingSpan); ok {
			sdkSpan.addChild()
		}
	}

	s := tr.newSpan(ctx, name, &config)
	if rw, ok := s.(ReadWriteSpan); ok && s.IsRecording() {
		sps := tr.provider.getSpanProcessors()
		for _, sp := range sps {
			sp.sp.OnStart(ctx, rw)
		}
	}
	if rtt, ok := s.(runtimeTracer); ok {
		ctx = rtt.runtimeTrace(ctx)
	}

	return trace.ContextWithSpan(ctx, s), s
}
可以看到Trace.Start工作就是通过newSpan函数创建一个新Span,新的Span继承父Span的TraceID并生成新SpanID,并记录父Span的Context。
然后再通过trace.ContextWithSpan函数,基于父Context生成新的Context并绑定Value。
进程内传递元数据
ContextWithSpan和SpanFromContext是在进程内传递Trace数据的关键,适用于同一进程的多Goroutine间传递。
// ContextWithSpan returns a copy of parent with span set as the current Span.
func ContextWithSpan(parent context.Context, span Span) context.Context {
    return context.WithValue(parent, currentSpanKey, span)
}

// SpanFromContext returns the current Span from ctx.
//
// If no Span is currently set in ctx an implementation of a Span that
// performs no operations is returned.
func SpanFromContext(ctx context.Context) Span {
    if ctx == nil {
        return noopSpanInstance
    }
    if span, ok := ctx.Value(currentSpanKey).(Span); ok {
        return span
    }
    return noopSpanInstance
}
其实现就是利用context.Value特性把Span绑定在同一Key下进行读取
跨进程传递请求信息
除了进程内Goroutine间传递Trace信息,在微服务架构中,我们还经常需要从Http的Header或Grpc的metadata中解析跨服务传播的Trace信息。一般通过Grpc拦截器或Http中间件实现。
以Grpc客户端的WithUnaryInterceptor拦截器为例
func UnaryClientInterceptor(opts ...Option) grpc.UnaryClientInterceptor {
	return func(
		ctx context.Context,
		method string,
		req, reply interface{},
		cc *grpc.ClientConn,
		invoker grpc.UnaryInvoker,
		opts ...grpc.CallOption,
	) error {
		// 从上下文中提取 Trace 信息
		propagator := otel.GetTextMapPropagator()
		ctx = propagator.Extract(ctx, metadata.NewOutgoingContext(ctx, metadata.MD{}))

		// 创建新的 Span
		tracer := otel.Tracer("grpc-client")
		ctx, span := tracer.Start(ctx, method)
		defer span.End()

		// 将 Trace 信息注入到 gRPC metadata 中
		md, ok := metadata.FromOutgoingContext(ctx)
		if !ok {
			md = metadata.MD{}
		}
		propagator.Inject(ctx, propagation.HeaderCarrier(md))
		ctx = metadata.NewOutgoingContext(ctx, md)

		// 发起 gRPC 请求
		err := invoker(ctx, method, req, reply, cc, opts...)

		// 记录请求结果
		if err != nil {
			span.RecordError(err)
			span.SetStatus(codes.Error, err.Error())
		} else {
			span.SetStatus(codes.Ok, "OK")
		}

		return err
	}
}